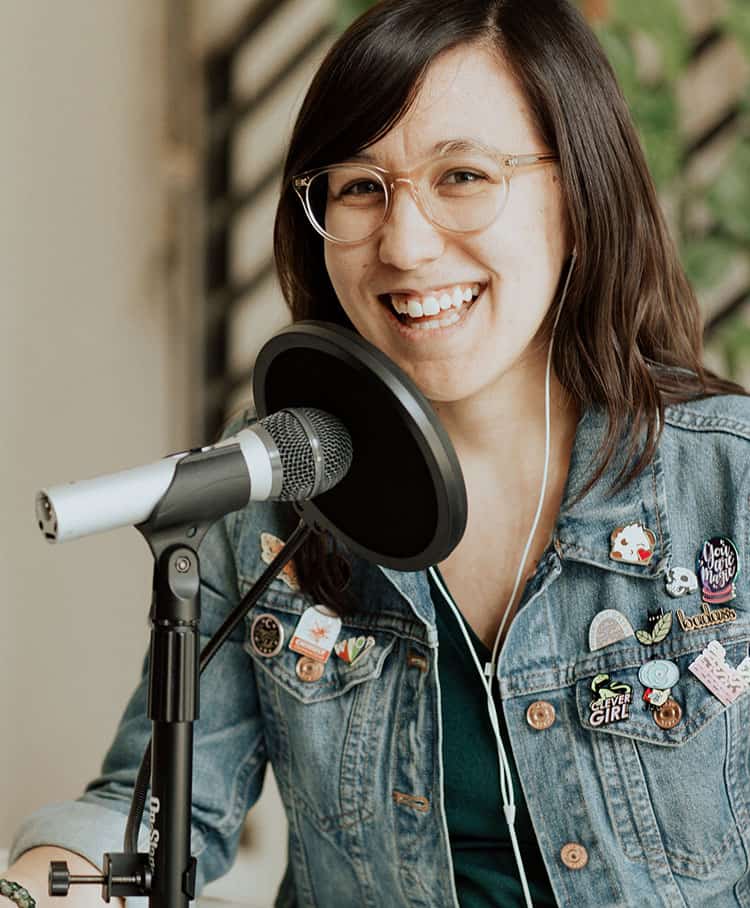
• Skip to primary navigation
  • Skip to content
  • Skip to primary sidebar
  • Skip to footer
  • Home
  • Recipe Index
  • About
  • Work with Me
  • Contact

small eats

healthy eats for a small table

By Aimée · Filed Under: Winter

Warm Einkorn Romanesco Salad

smalleats-warm-einkorn-romanesco-salad

The more I’ve been thinking about this recipe the more I think of it as a “deep cut”. Pulling deep into the agricultural universe and grabbing something a little different that people just don’t eat everyday. (And if you do, you’re pretty awesome. Let’s talk!)

Einkorn is one of the up-and-coming grains in the health food world, even though it’s one of the oldest grains out there. I first learned about it last year and was real intrigued by it. Because it’s so old and not very well known now, it’s very pure. It hasn’t been tampered with genetically or used to make other kinds of wheat. Einkorn’s purity means you get the maximum amount of minerals, protein, and fiber this grain has to offer. All pluses to me. Einkorn can also be ground into flour and used in sweet applications too! My friends at Food Loves Writing are the place for those.

smalleats-romanesco

Romanesco is also something newer to me. I first got one in a CSA two winters ago and was blown away by it. Edible fractals! I roasted it and fell in love with deep and complex flavor. And, let’s be honest, how cool it looks.

Combining just these two deep cuts tastes hearty and wonderful all on it’s own, but my little Greens cheerleader advised me on adding more greens and making it a great salad.

Print
Warm Einkorn Romanesco Salad

Ingredients

  • 1/2 cup einkorn berries, uncooked
  • 1 head of romanesco
  • olive oil, for roasting
  • salt, for roasting
  • pepper, for roasting
  • 3-4 handfuls of greens per person (I used Earthbound Farm's Power Greens)

Instructions

In a bowl, add the uncooked einkorn berries. Cover with enough water to leave about an inch or so over the berries and soak overnight.

Once the berries are soaked, bring 1 cup of salted water to a boil and add berries. Simmer for 25-30 minutes, until al dente. Drain any excess water.

Preheat oven to 375. Line a baking sheet with foil.

Turning the head of romanesco upside down, remove leaves and cut out the core much like coring a head of lettuce. Take out as much of the center and stems as you can and separate larger florets into smaller ones.

Place florets on baking sheet and drizzle with olive oil and sprinkle salt and pepper over them. Roast for 15-20 minutes, until fork tender.

In a bowl, combine einkorn and romanesco and add any salt to taste.

To serve, put handful of greens on plate or bowl. Then top with warm einkorn and romanesco mixture.

3.1
(c) 2013-2014 Small Eats

By Aimée · Filed Under: All Year

Top to Tail Beet Quinoa

smalleats-top-to-tail-beet-quinoa

Eat More Greens, my 2014 motto, has become a little person sitting on my shoulder, saying “You could add greens to that.” This recipe is a perfect example of that. I first threw this dish together for New Years when I had R and C over for our annual Roast Chicken and Twilight Zone dinner (third year strong!). I usually just make rice to go with the roast chicken, but I decided to mix it up with our otter grain staple, quinoa. I added beets because we had them in the house and C loves beets.

The first time I made this, it was just roasted beets and quinoa. It was good, but something was missing. So when I was making this to share with you, I was thinking, what will make this dish better? The little greens cheerleader said “More greens!” and this incarnation was born.

Not only do you get vegetables and protein-packed grain, but when you make this, you’re using the whole vegetable. Most people throw away the beet greens, thinking the magic is only the root. Wrong! The magic is the entire thing! Beet greens have a mellow flavor, so they’re pretty versatile in any dish that calls for cooked or raw greens.

Maybe my greens cheerleader is getting a waste less friend…

Print
Top to Tail Beet Quinoa

Ingredients

  • 3 cups of cooked quinoa (1 cup uncooked quinoa)
  • 1 bunch of beets with tops
  • salt, to taste
  • olive oil for roasting and for sauteing
  • 1/2 tsp paprika

Instructions

Preheat oven to 475.

Separate beet greens from beets. Wash beets and pat dry. Place beets on a large sheet of foil. Drizzle with olive oil, salt, and pepper. Wrap the beets in the foil and roast on a baking sheet for an hour. If you have larger beets (big than a baseball) you may need longer than an hour.

Once beets are done, open packet and set aside to cool.

Wash beet greens and de-stem the beet greens, keeping the stems in a separate pile. Roughly chop the beet greens and finely chop the beet stems.

Heat a pan to medium heat with a drizzle of olive oil. Add beet stems and cook for 2-5 minutes. Add beet greens and cook until wilted, about 5-8 minutes. Add the paprika and some salt to taste.

Once beets are cool, remove the skins and dice the beets.

In a large bowl, combine the cooked quinoa, diced beets, and beet greens and stems. Combine throughly and add salt to taste.

Notes

If you want two color quinoa, combine 1/2 cup regular quinoa and 1/2 red quinoa when cooking. Who needs those expensive mixes, anyway?

3.1
(c) 2013-2014 Small Eats

By Aimée · Filed Under: All Year

Togarashi Tofu with Spinach and Soba

smalleats-togarashi-tofu-with-spinach-and-soba

It’s that time of year again: resolution time. We’re constantly barraged with people, social media, companies, and newsletters asking us about our resolutions or trying to sell us more workout equipment we may or may not use.

I’ve set resolutions is the past, like most, and like most, they never stick. They seem too big, too overwhelming, and ultimately disappointing when they’re not made.

I prefer something smaller, more actionable. Something I can do everyday that won’t make me throw up my hands if I forget about it that day.

This year, one of my main focuses will be to eat more greens.

I already make pretty vegetable-centric dishes, but I’m going to kick this up this year. Greens are good. They’re loaded with vitamins, low in calories, and they’re damn delicious. I hope you’ll enjoy the greensplosion in 2014, because it’s coming 😉

Print
Togarashi Tofu with Spinach and Soba

Ingredients

  • 1 block of extra firm tofu, patted dry
  • 1 tbsp olive oil
  • 2 bunches of soba
  • 2-3 handfuls of greens, per serving
  • shichimi togarashi, to top
  • 2 tbsp white miso paste
  • 1 tbsp rice vinegar
  • 1 tbsp sesame oil
  • 1 tsp cold water

Instructions

Cut the tofu into strips, about 1/4 inch thick.

Heat a saucepan to medium heat and add the olive oil. Once hot, add the tofu, making sure none of the tofu is overlapping. Let cook for 2-3 minutes, then flip and cook for another 2-3 minutes.

Bring water to a boil in a pot and add the two bunches of soba. Cook for about 4-5 minutes. Drain.

In a small bowl, combine miso paste, rice vinegar, sesame oil, and cold water. Mix until miso is fully dissolved.

To assemble the dish, put the soba on a plate or in a bowl. Follow with your handfuls of greens. Add tofu and liberally cover with shichimi togarashi. Top with miso dressing.

Notes

Most shichimi togarashi is a finer texture. My thicker togarashi is from the lovely Oaktown Spice Shop in Oakland.

3.1
(c) 2013-2014 Small Eats

By Aimée · Filed Under: All Year

Buddha’s Feast

smalleats-buddhas-feast

Today marks two weeks since my grandma’s passing.

In one of my earlier posts, I mentioned that someone dear to my heart was in the hospital. I didn’t want to say that it was my grandma, my last grandma, my last surviving grandparent. I didn’t want people to know because I wanted her to get better. I wanted this to just be another thing that would become a distant memory that my grandma and I would briefly mention the next time I saw her.

It didn’t happen like that.

My grandma couldn’t beat it this time and passed away on December 12th.

grandmagrandpa

Betty saw a lot of things in her long life. She moved out of Chinatown. She and my grandfather moved up in society. They lived in a beautiful house built by my grandpa and my dad that was the place for celebrating. She saw a lot of wonderful things and had a lot of great memories. But she also had struggles. She lost my grandfather to cancer and had spent the last 20 years without him. She had health issues. She attended a lot of funerals as time went on. Aging made things different and more difficult.

Grandma and I weren’t very close as I was growing up. She lived in San Francisco and I grew up mostly in the South. I saw her every other year for Christmas and talked to her briefly on the phone around other holidays, sent her cards for her birthday. I knew she was proud of us, but we didn’t really have a deep relationship.

My relationship with her had changed over the years partially due to my other grandma, Gloria. Like I’ve mentioned before, Gloria passed away my freshman year of college. It became very clear to me that I needed to give my last grandma, my last grandparent, more attention and love.

I was now in Los Angeles and started to visit her on my own, rather than with my family or other family around. I sent her more cards, just because, to say hi, to wish her well. I sent her cookies for the Christmases my family didn’t spend with her. I started going up for Chinese New Year. I wanted her to know that I cared about her and I appreciated her.

While I got my love of baking from my grandma Gloria, I got my love of cooking and food from my father and grandma Betty. My great grandfather worked in the restaurant industry in San Francisco. When we visited her, we always indulged on good Chinese food and dim sum.

I got stuck trying to find a recipe to honor her memory. Out of the eleven Chinese cookbooks I own, most of the dishes had no connection to her, to the things we ate together. I eventually found a kind of dish, jai choy, that will probably be served at the memorial lunch I’ll be attending soon. It’s a vegetable dish that would traditionally be left at a loved one’s grave to bring them into the afterlife and also served at the memorial meal for the family. While our family isn’t extremely traditional, I thought it would be the best way to remember her.

I modified this Buddha’s Feast recipe I found to have the vegetables that my family most commonly ate, so if you’d like to substitute or omit any, feel free.

Goodbye, Grandma. I love you. I miss you.

Print
Buddha’s Feast

Ingredients

  • 2 dried bean curd sticks
  • large handful dried black mushrooms
  • 1 bundle dried bean thread noodles (also called vermicelli noodles in Chinese grocery stores)
  • 1 1/2 cups low sodium vegetable stock
  • 1/4 cup oyster-flavored sauce
  • 1 tbsp soy sauce
  • 1/2 tsp sugar
  • 2 tbsp vegetable oil
  • 1 tbsp fermented red bean curd
  • 1/2 cup bean sprouts
  • 2-3 heads baby bok choy, roughly cut
  • 5-10 stalks Chinese broccoli, roughly cut
  • 1/4 cup canned water chestnuts, drained and chopped
  • 1/2 cup canned bamboo shoots, drained and sliced
  • 1/2 green beans, trimmed and chopped to 1/2 inch lengths
  • 1/2 can baby corn, halved

Instructions

In separate bowls, place dried bean curd sticks and dried black mushrooms. Pour boiling water over both and let soften for 30 minutes.

Once done, drain water and roughly chop bean curd sticks and de-stem black mushrooms.

In a medium sauce pot, bring water to a boil. Once at boil, remove from heat and add dried bean thread noodles. Completely submerge in water and let soak for 10 minutes. Once soaked, drain and set aside.

Combine stock, oyster-flavored sauce, soy sauce, and sugar into a bowl. Mis together and set aside.

Heat a wok (or very large skillet) over high heat. Once hot, add vegetable oil and coat sides with it.

Add bean curd and cook for a minute. Once done, add red bean curd, bean sprouts, baby bok choy, mushrooms, Chinese broccoli, water chestnuts, bamboo shoots, green beans, baby corn, and stock sauce. Stir to throughly combine then bring to a boil. Once at a boil, bring to a simmer and cover the wok. Let simmer for 10-15 minutes, until the vegetables are at your desired texture.

Notes

Adapted from Martin Yan's Chinatown Cooking

If you'd like a thicker sauce, add in a cornstarch and water mixture to thicken.

3.1
(c) 2013-2014 Small Eats

By Aimée · Filed Under: Treats

Pumpkin Persimmon Cookies

smalleats-pupmkin-persimmon-cookies

Giving cookies around the holidays makes them extra special. They carry a dash of extra magic and taste that much better. The magic grows when the cookies are made for a good cause.

This year, I had the honor of participating in the Great Food Blogger Cookie Swap, which raised over $13,000 for Cookies for Kids’ Cancer. It’s amazing to connect with other bloggers and raise money for an amazing cause.

I swapped cookies with three other bloggers. When I received their information, I found myself with an interesting challenge. Two of them couldn’t have chocolate and the last blogger didn’t like spicy things (which is ironic, given that so many of my recipes have heat in them).

After many hours of research (and drooling), I decided to make persimmon cookies. Persimmons are a great winter fruit and I’d never baked with them before. As I started making the recipe, I hit a snag. I didn’t have enough persimmon pulp for the full recipe. Thankfully, there was a savior in my pantry: Pumpkin puree! Pumpkin paired wonderfully with the persimmons and increased it’s seasonality (which I love). Necessity, or panic, is the mother of invention.

Print
Pumpkin Persimmon Cookies

Yield: 32-26

Ingredients

  • 2 cups flour
  • 1 tsp baking soda
  • 1/2 tsp salt
  • 1/2 tsp cinnamon
  • 1/4 tsp nutmeg
  • 1/4 tsp cloves
  • 1 cup sugar
  • 1/2 cup butter, room temperature
  • 1 egg
  • 1/2 cup persimmon pulp (from about 1 large hachiya persimmon)
  • 1/2 cup pumpkin puree
  • 1 cup dried cranberries
  • 1 cup walnuts

Instructions

Preheat oven to 325 degrees.

Combine flour, baking soda, salt, and spices in a bowl.

In a separate bowl, cream butter and sugar. Once creamed, add egg, them persimmon and pumpkin.

Fold in cranberries and walnuts.

With an ice cream scoop, drop the cookies on a cookie sheet lined with parchment paper. These cookies don't spread much, so flatten a little with a spoon if you prefer.

Bake for 12-15 minutes or until golden brown.

Notes

Adapted from White on Rice Couple

3.1
(c) 2013-2014 Small Eats

By Aimée · Filed Under: All Year

Miso Soup

smalleats-miso-soup

When it rains, it pours. This has been a rough week for me. On top of the stress of life, work, and the holidays, someone I hold close to my heart is in the hospital. Knowing that she’s not doing well and that I couldn’t travel to see her right now is hard to accept.

At one point, the rain was so torrential I had to stop and zoom out. Look at things beyond this week, this moment, these feelings. Looking at everything from way up above, I saw that I wasn’t taking care of me. It’s so easy to get caught up in the whirlwind and let seemingly little things drop. But most of the time, those little things add up to some peace, some balance, some sanity.

As I work on listening to myself again and restarting those little things, I turn to the kitchen to make miso soup. Miso soup is a simple thing that give me great peace. The comforting flavor of miso paired with the nourishment of seaweed, tofu, and dashi is a breath of much needed fresh air, a sigh of relief.

There are several ways to make miso soup, but I prefer the traditional way. It’s simple and I know exactly what’s going in my soup. The traditional way means you make your own dashi broth from scratch. You’ll need to buy kombu seaweed (it’s also often called dashi kombu seaweed) and shaved bonito flakes for the broth. Kombu seaweed is a larger and flatter seaweed that comes in strips. Bonito flakes (or katsuobushi) are dried and smoked shavings from the bonito fish. Bonito gives the broth a great depth and umami.

Once you’ve made the broth, you can add shiitakes, tofu, and wakame. Feel free to add more ingredients, like bok choy, green onions, soba noodles, even rice. At the last minute, you’ll swirl in dissolved miso paste and the whole soup comes alive. Miso soup is one of my comfort foods, so make it as comfortable as possible.

Print
Miso Soup

Ingredients

  • 6-8 cups water
  • 2 1/2 inch piece kombu seaweed
  • 1 large handful shaved bonito flakes
  • 1/2 block extra firm tofu
  • 1/4 cup dried wakame
  • 1/3 cup dried shiitake mushrooms
  • 2-3 tbsp miso

Instructions

In a large stock pot, add 6-8 cups of water and kombu. Bring to a boil.

Remove from heat, add bonito flakes and recover. Let the broth sit for 15-20 minutes.

While broth is developing, bring water to bowl in a tea pot. Place the wakame and mushrooms in separate bowls. Pour boiling water in both bowls, enough to cover each ingredient. Let sit until rehydrated.

Cube extra firm tofu. Once wakame and shiitakes are rehydrated, drain water and finely dice both. Remove any woody stems you find on the shittakes.

Using a wire or spider skimmer, discard kombu and bonito flakes from broth. Some smaller pieces of the bonito will remain. Put broth back on the medium low heat and add tofu, wakame, and shittakes.

In a small bowl, dissolve miso with broth. Once the broth and ingredients are heated, remove from heat and add dissolved miso. Stir to incorporate and serve.

3.1
(c) 2013-2014 Small Eats

  • « Previous Page
  • Page 1
  • …
  • Page 65
  • Page 66
  • Page 67
  • Page 68
  • Page 69
  • …
  • Page 72
  • Next Page »

Primary Sidebar

AiméeHi and welcome to Small Eats! I'm Aimée, a Nutritional Therapy Practitioner, food blogger and yogi. I'm here to help you find your healthy, one small step at a time with great, nutrient dense food and lifestyle changes. Learn More…

Follow Small Eats

  • Email
  • Instagram
  • Pinterest
  • RSS
  • Twitter

Newsletter

Sign up to get exclusive health info and recipes you won’t find on the blog.


Categories

  • All Year
  • Collaborations
  • Cookbooks
  • Fall
  • Nutrition DL
  • Resources
  • Small Fact Friday
  • Spring
  • Summer
  • Travels
  • Treats
  • Uncategorized
  • Wellness
  • Winter
Learn more about the NTA

Footer

MENU

  • Home
  • Recipe Index
  • Work with Me
  • About
  • Contact

Legal Information

This website is written for educational purposes only and hasn’t been approved by the FDA. Content should not be considered a substitute for professional medical expertise. Always consult a qualified health professional before starting a new diet or health program or regarding any health conditions or concerns.

Affiliate Disclosure

Small Eats is a participant in the Amazon Services LLC Associates Program, an affiliate advertising program designed to provide a means for sites to earn advertising fees by advertising and linking to amazon.com.

© 2013–2018 small eats / aimée suen · Cookd Pro Theme